To use your ALTOSTRATUS sensor with the CIRRUS system:
Turn on the sensor by pressing the power button once. The LED should blink green and blue.
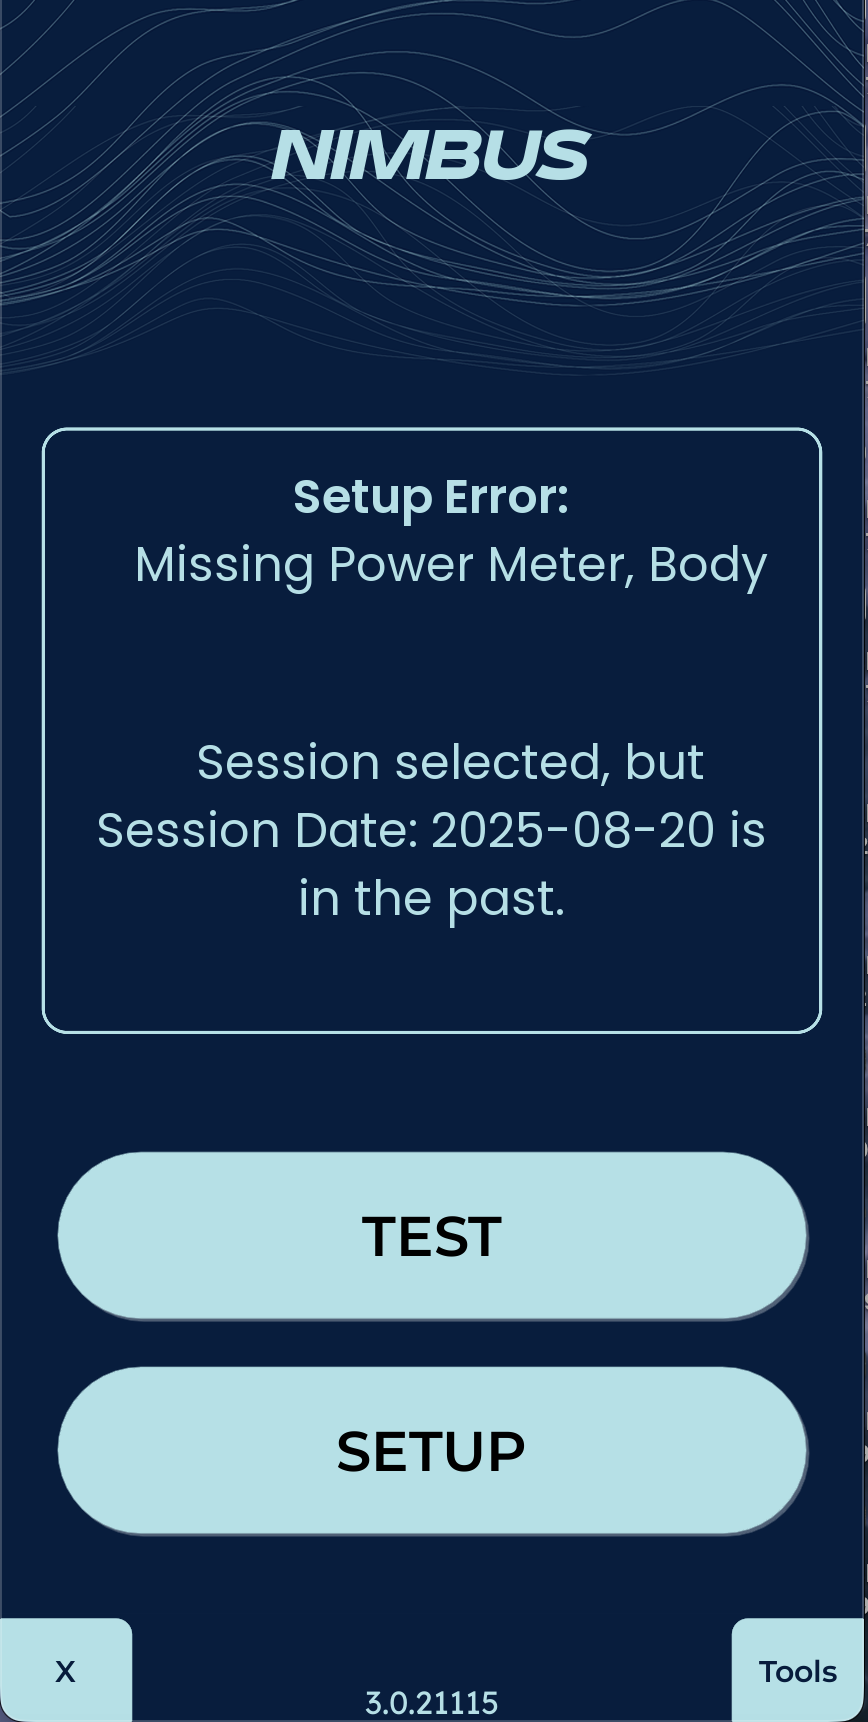
Start the NIMBUS app in the data logger. The NIMBUS app will come
pre-installed.
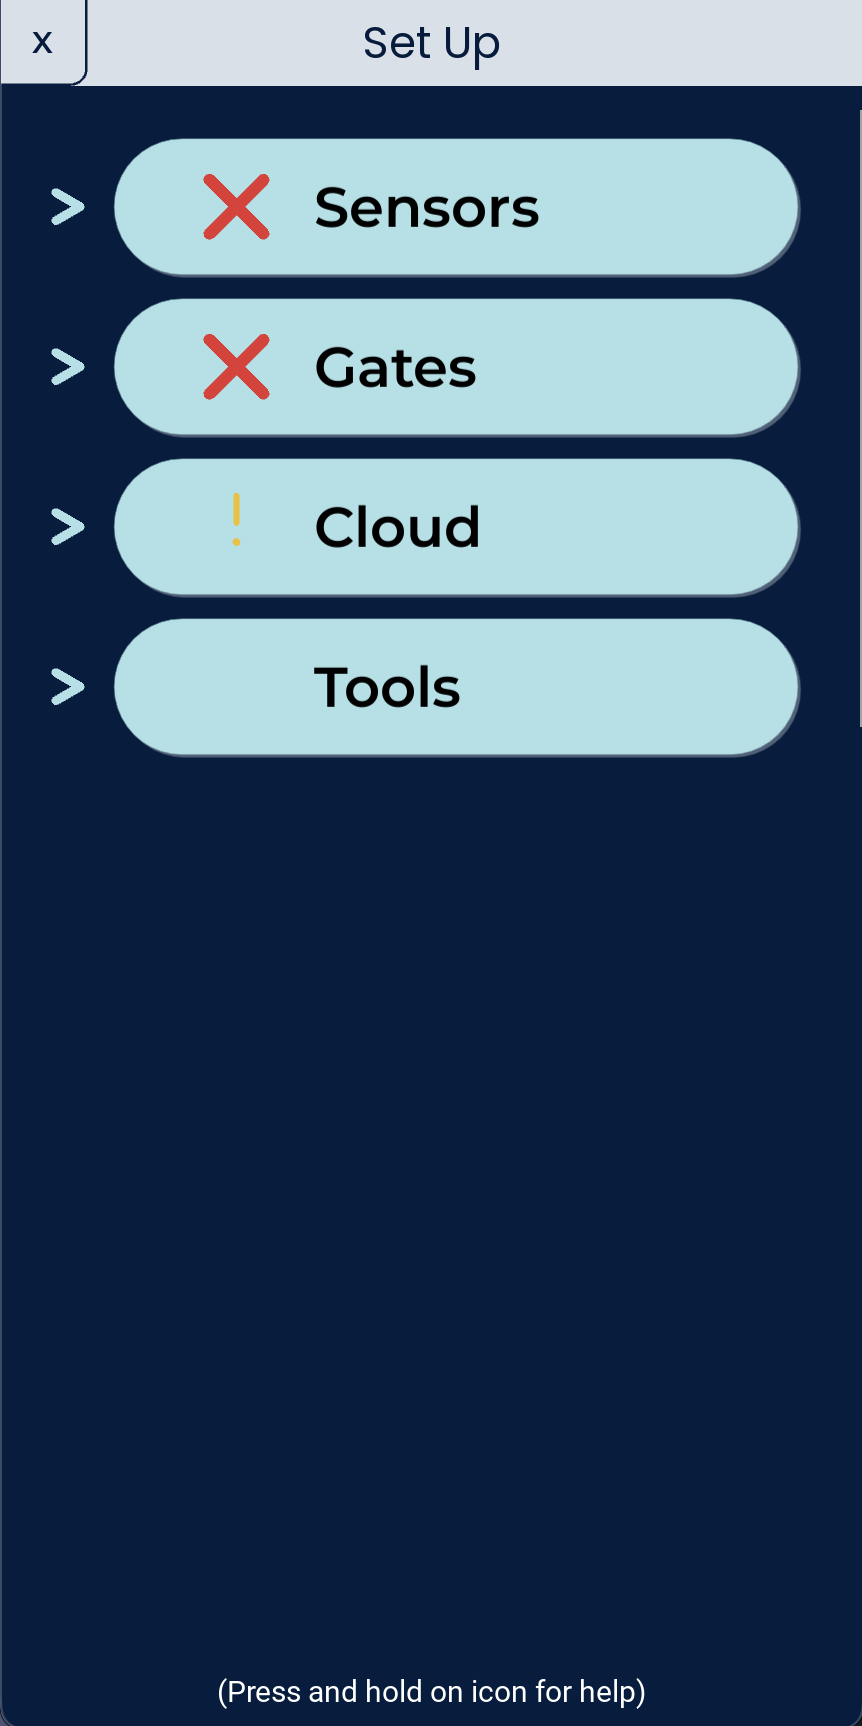
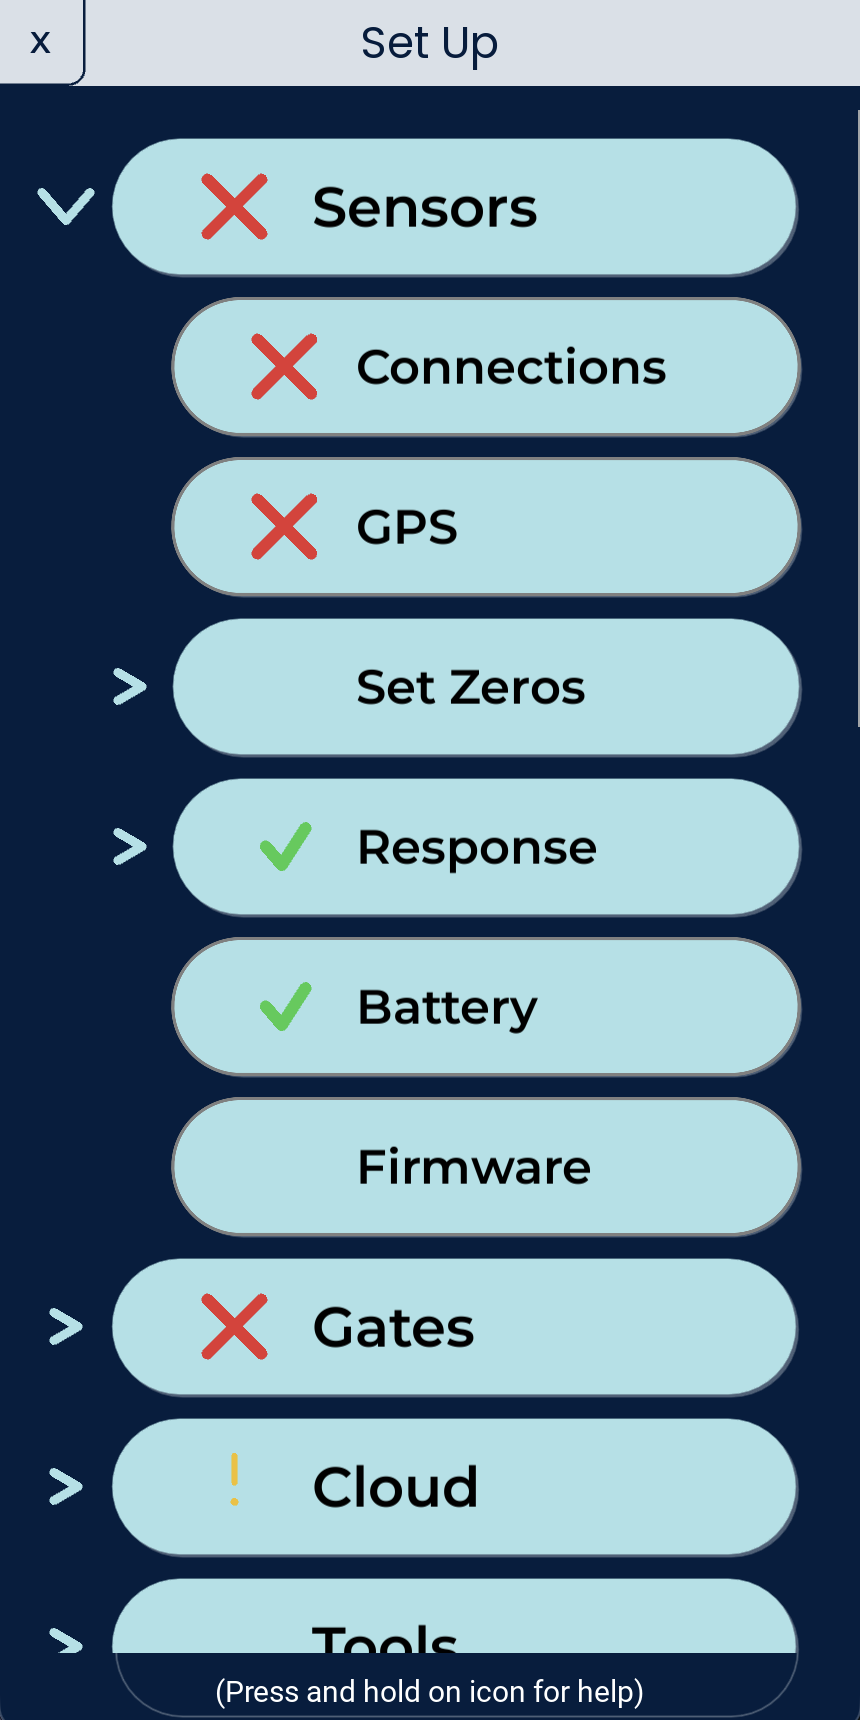
On the start up screen, go to Setup
Expand the Sensors section.
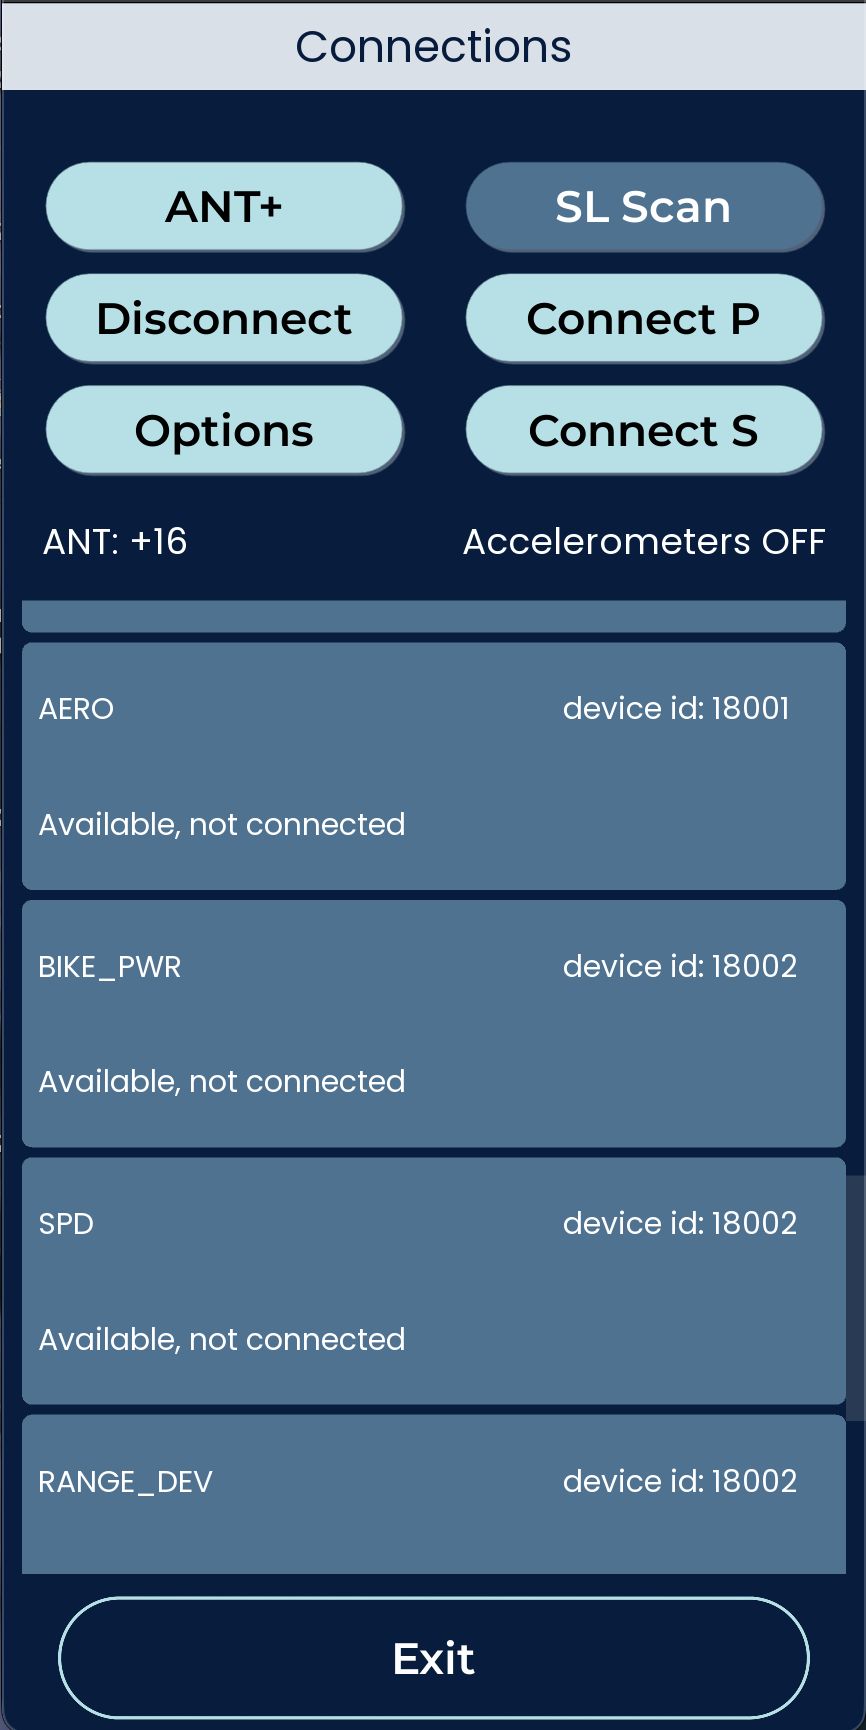
Select Connections
To connect the ALTOSTRATUS, press SL Scan
After devices appear, select AERO_5 and press Connect
The sensor should now show as TRACKING
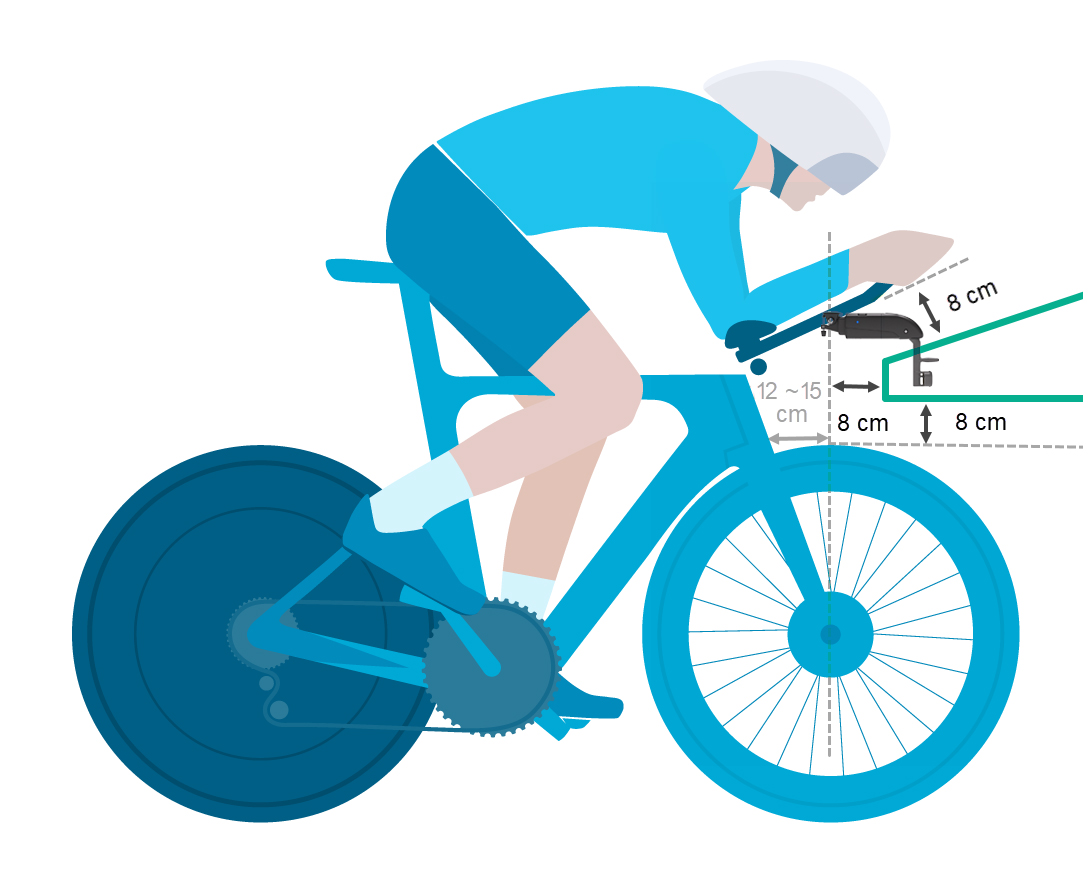
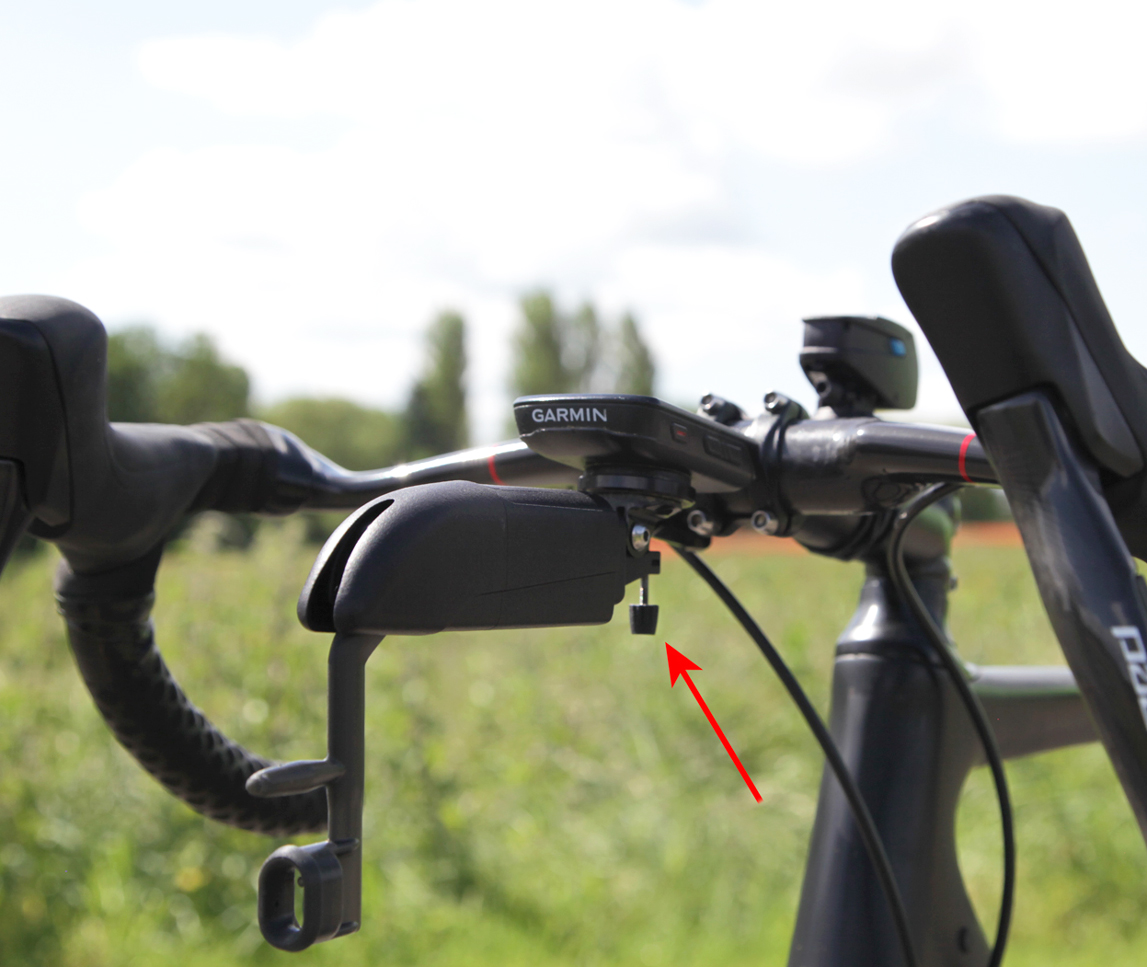
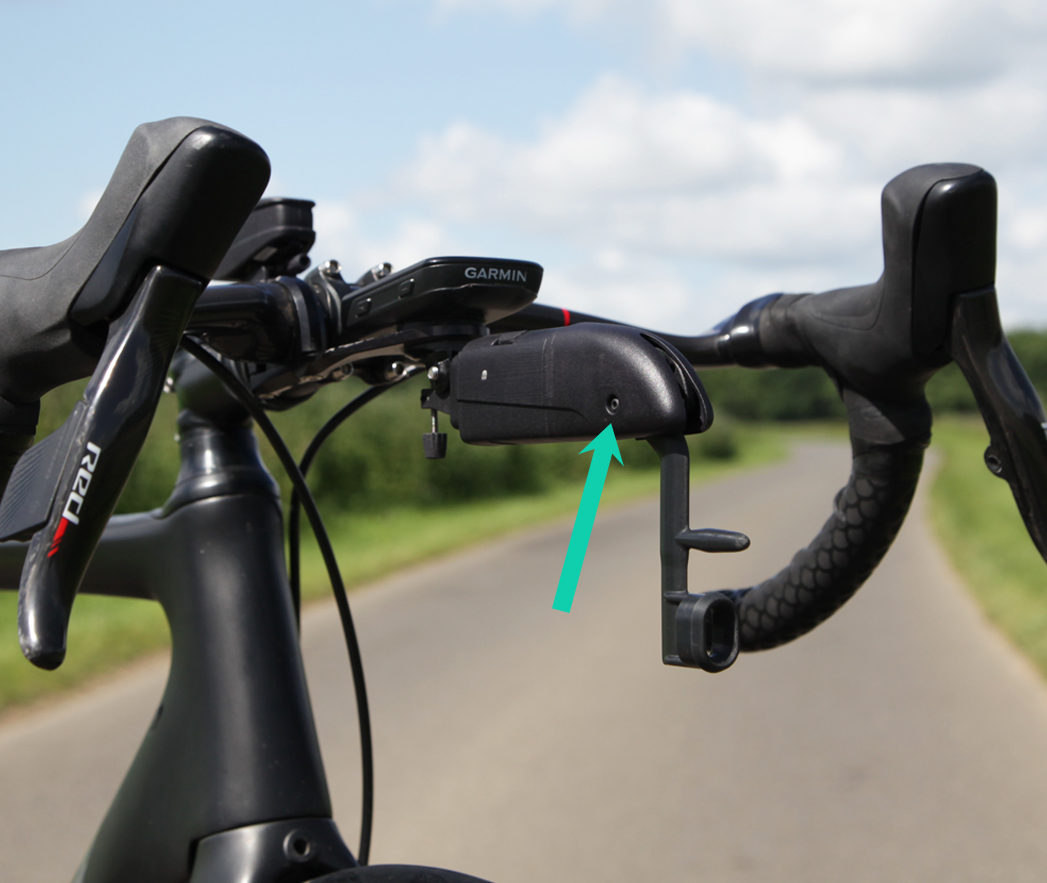
Mount the Device
Please mount the ALTOSTRATUS probe to the bike so that the head of the probe is inside of the green zone, as shown in the drawing below.
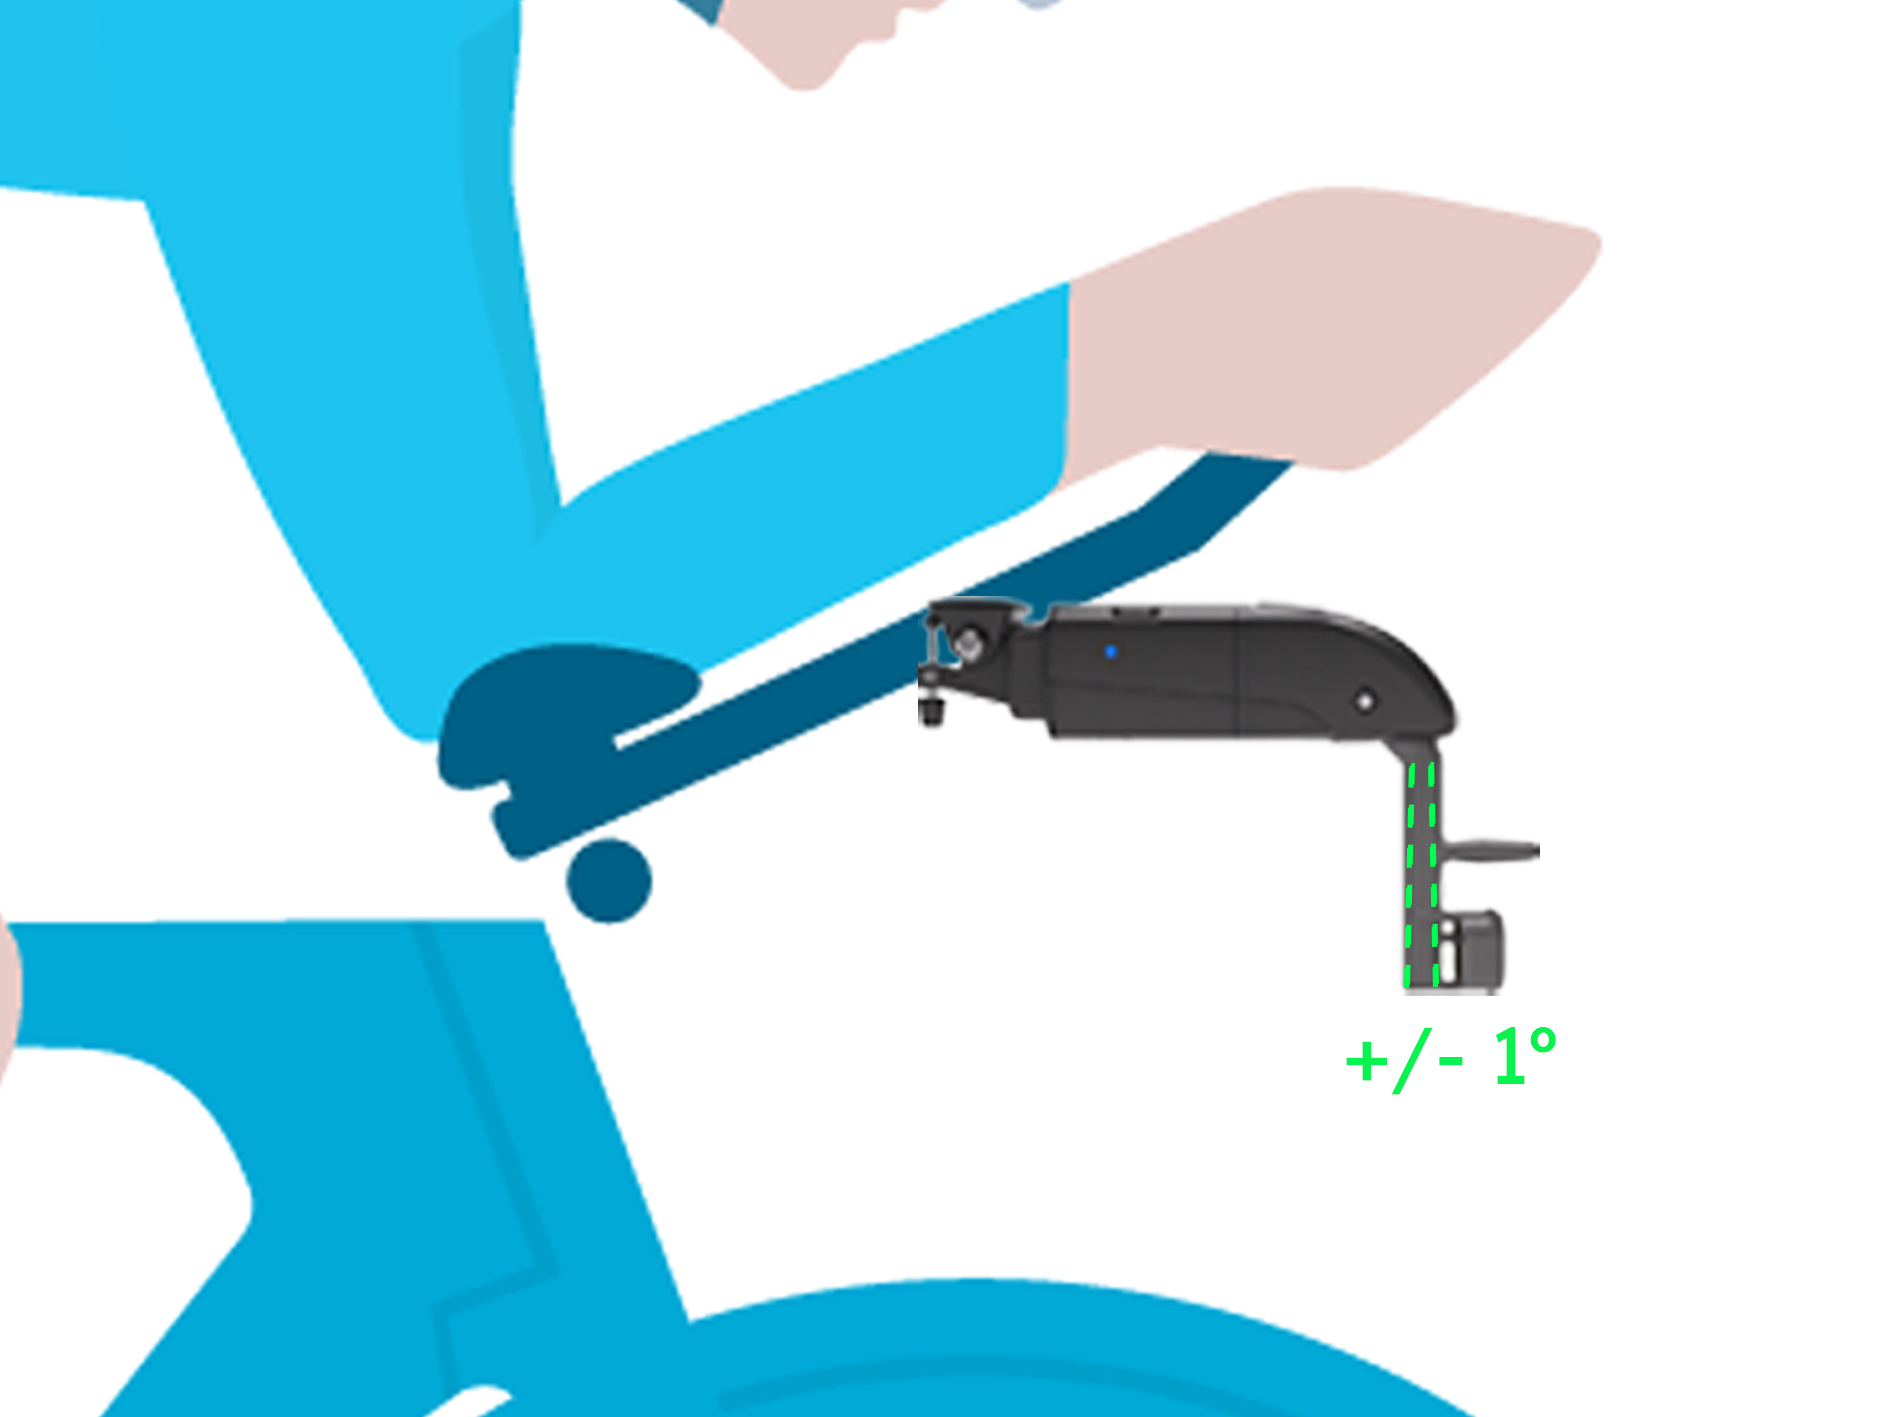
Ensure that the probe head is parallel to the ground. Aim for +/- 1 degree but a variation of 2-3 degrees will not cause
a significant error.
Lock the pivot bolt using a 2mm allen key to avoid movement while testing.
Use the manual regulator to adjust the angle.
Now tighten the screw on the Go Pro mount.
Finally, tighten the pivot screw on the opposite side of the probe.
For assistance with custom mounts please send a message to support@streamlines.aero
Reset & Update
Reset the ALTOSTRATUS
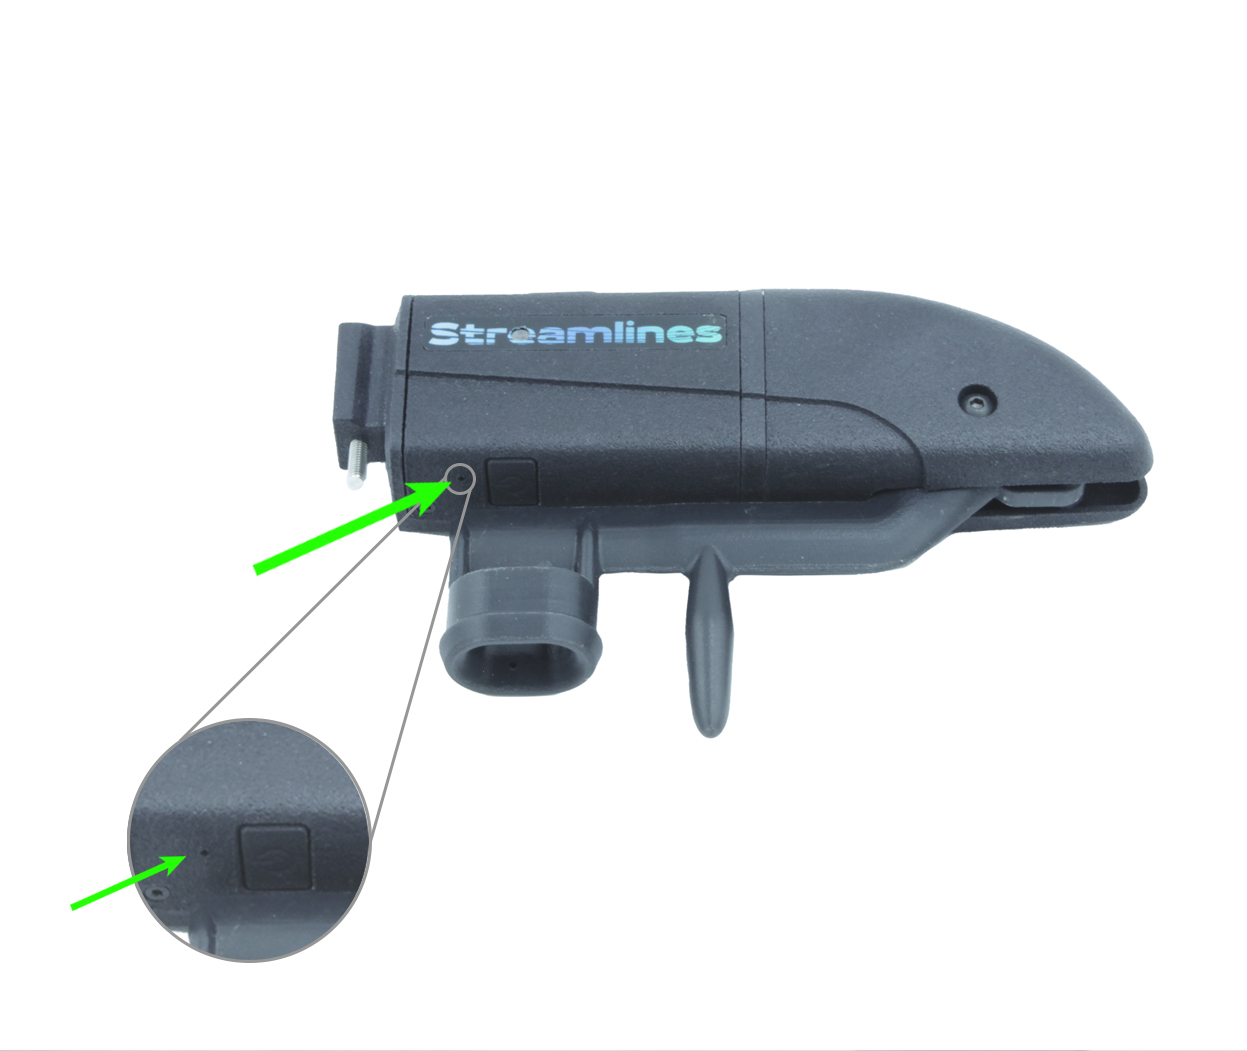
If the ALTOSTRATUS device becomes unresponsive you can manually reset it by inserting a pin into the hole above the charging port and
pressing it down for 3 seconds. This reset only cuts off the power and will not erase any stored data.
Update the ALTOSTRATUS
Please periodically check if your ALTOSTRATUS sensor is running the latest software version by downloading the Streamlines Firmware
Updater App (available at the iOS App Store and Google Play Store) and updating it when appropriate.
How to use the Firmware Updater App:
Ensure Bluetooth is turned on phone
Open the Streamlines Firmware Updater App
Select 'ALTOSTRATUS' on the top tabs
Press 'Load from server' button
Then, press the ALTOSTRATUS device's power button 10+ times; the LED should blink red & green
Next, press 'Start update' button on the app
On the ALTOSTRATUS, the LED will flash blue while updating, then it will flash blue and cyan once the update is complete
Important Safety Information
WARNINGS:
Pay attention to your surroundings and use your best judgement to ensure you always operate the bicycle safely.
Before turning around after completing a traverse, we strongly recommend that the rider comes to a complete stop and ensures that no vehicles are behind them.
Your bicycle and hardware should be properly installed and maintained at all times.
The use of LED lights is always recommended during testing.


 WARNINGS: